
Go to https://ad-optimizer.metoda.com
Click on the "Campaigns" section in the sidebar on the left.
Campaigns can be edited at any time.
You have 3 options, depending on how many changes you want to implement and if they are similar:
-
Case 1: update one single campaign by clicking on the respective field in the table and adjusting it. This option is recommended if you only want to implement a low number of changes.
-
Case 2: select several campaigns and use the bulk actions menu to implement the same change for all selected campaigns at once. This is recommended if you want to change multiple campaigns, but the same setting should be adjusted, e.g. the same End Date should be set for all selected campaigns.
-
Case 3: export the campaigns, adjust the settings in the Excel file and import it afterwards. This is recommended if you want to implement diverse adjustments for many different campaigns.
Case 1: Updating one single campaign by clicking on the respective field in the table
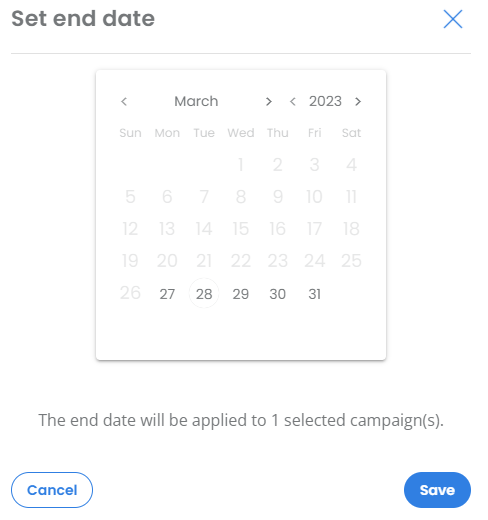
Simply click on one of the blue fields in the table that you want to adjust, for example, the end date:

A pop-up window opens, and you can select the end date for that campaign. This works similarly for all other editable fields (Enabled, Campaign, Portfolio, Goal, Targeting, Start (date), End (date), Category & Tags). Additionally, clicking on the campaign name enables you to edit the custom image.
Please note: certain fields can't be edited at all, this includes campaign type and the basic targeting type (auto vs. keyword vs. product). If you would like to change the type, you need to create a new campaign instead (and pause the existing one).
Case 2: Updating several campaigns via the bulk actions
Select all the campaigns you would like to edit at the same time.
Tip: combine several filters in order to identify all the campaigns you would like to edit, e.g. Enabled= true, Campaign type = SP, Portfolio = m_test5, m_test33 and then select all the results. Click on "Filter by" to select the filters.

Click the top box to select all campaigns that are displayed. At the bottom, below the table, you will see how many campaigns you have selected. Please note that not all results may be displayed on the first page. Then adjust the number of results per page at the bottom of the table (bottom right).

Select one of these bulk actions, insert additional input where necessary, and your changes will be implemented for all selected campaigns. Please find definitions of the bulk actions in the table below:

*Additional possibility to upload important keywords manually (white listing). Limited to 1000 keywords/campaign, and each one of them may not exceed 4 words. They need to be separated by pressing enter.
Use broad match for loose targeting, meaning the keyword needs to be included in the consumer's search term.
Use phrase match for more precise targeting, meaning that the exact order of the keywords needs to be included in the consumer's search term.
Use exact match for highly precise targeting, meaning that the consumer needs to search exactly what you have defined as a keyword.
**Use for blacklisting in order to make sure that your ad will not be displayed for irrelevant search terms. Limited to 1000 keywords/campaign, and each one of them may not exceed 4 words. They need to be separated by pressing enter.
Use exact match in case you want to exclude that exact search term.
Use phrase match in case you want to exclude all search terms that include the negative keyword.
Case 3: Campaign updates using "Import"
Start with the "Export in bulk import template" in the campaigns table.
Tip: combine several filters in order to identify all the campaigns you would like to edit, e.g. "Campaign type = SBA, Management option = Full support" and then select all the results.

Of course, you could also simply export all the campaigns, do your adjustments (also only to a sub-set of the campaigns) and import the file again. Any campaigns that were not touched will remain as they are.
Please note that the export includes a dedicated Campaign ID. It is used to identify that specific campaign (this is more reliable than just using something like a campaign name). If you want to create a new campaign (e.g. in a new portfolio), that ID needs to be deleted. If you want to edit a campaign, never delete this ID.
Now, it's up to you to insert your changes to the following columns:
-
Campaign Name
-
Portfolio name (It is possible to change the portfolio. However, for a better overview it is our best practice to create a new campaign)
-
SKUs (Seller only)
-
TACOS
-
Start Date
-
End Date
-
Metoda campaign category
-
Metoda campaign tags
-
Target harvesting
-
Negative keywords
-
Negative products
-
Negative brands
-
Positive keywords
-
Positive products
The following columns cannot be edited in the Ad Optimizer. If you want to adjust these nevertheless, you need to copy the campaign, edit it and pause the old one (this is explained in further detail in the second section of this article). Certain parts can also be customized in the Amazon Console.
-
SP
-
advertised ASINs
-
Targeting type
-
-
SB
-
Landing page type
-
Landing page link
-
advertised ASINs (can be updated in the Amazon Console)
-
Logo image (can be updated in the Amazon Console)
-
Headline (can be updated in the Amazon Console)
-
Brand name (can be updated in the Amazon Console)
-
+ SB (store spotlight)
-
Brand store link (Main page)
-
Store page links (can be updated in the Amazon Console)
-
Store page ASINs (can be updated in the Amazon Console)
-
Store page display names (can be updated in the Amazon Console)
-
-
-
-
SD
-
advertised ASINs
- Logo image (can be updated in the Amazon Console)
-
-
-
Headline (can be updated in the Amazon Console)
-
Click on "Import" at the top of the page.
 Upload the file.

Choose the "Campaigns" upload as well as the matching import settings.
If the bulk template contains numerous targets/keywords, consider selecting "Remove invalid targets/keywords and only add valid ones." However, for a more cautious approach, opt for "Refuse creation/update and provide issue report" to ensure any potential issues with the campaigns are identified and not overlooked or left uncreated.
In case something had not been filled in properly in the file, you will receive an error excel indicating which adjustments are necessary. You only receive an error file, if you choose the import setting "Refuse creation/update and provide issue report". Correct the errors and upload the file again.
Case 2: Changes of portfolio, landing page, ASINs, images, Brand name
For other adaptions listed below, the campaign needs to be stopped, copied, updated and submitted as new campaign:
-
Portfolio name (It is possible to change the portfolio. However, for a better overview it is our best practice to create a new campaign)
-
Landing page type
-
Landing page link
-
ASINs
-
Targeting type
Step 1: Pause current campaign
To pause the current campaign, just set an end date or use the "Pause" functionality in the bulk actions menu. Choose "yesterday" to pause the campaign immediately, or set any other day you wish the campaign to end.

Step 2: Copy current campaign
In order to copy an existing campaign, please select a non-rejected "Full support" campaign by ticking the check-box on the left, open the bulk actions menu (little arrow next to the select all functionality) and click on the button "Copy" or "Copy as a draft".

Please note that only one campaign at a time can be copied and only non-rejected campaigns can be copied. Campaigns with status "rejected" cannot be copied but need to be resubmitted (for further information refer to How to resubmit rejected Sponsored Brands).
Step 3: Adjust campaign
If "Copy" is selected, the campaign will be copied as it was. The portfolio can be changed afterwards.
If "Copy as a draft" is selected, you will be redirected to the Campaign creation flow. There you can make all the desired adjustments.
Below is a link to an overview of all campaign types and how they can be created.
Please note that Amazon reviews all Sponsored Brands and Sponsored Displays, and therefore, they might get rejected. Please check whether your copied campaign was approved by Amazon one day after creation.
Please note that all keywords and bids will be copied from the previous campaign. If you do not want this to happen, create an entirely new campaign instead of copying.